Frappe
Products
Helpdesk
Setup Guide
Frappe
Products
Insights
Setup Guide
Your First Steps with Frappe Helpdesk
Welcome to Frappe Helpdesk! We’re so glad you’re here.
We built Frappe Helpdesk because we were tired of tools that were too complicated or too expensive.
This one's different. It's simple, open-source, and easy for both agents and customers.
In this guide, we’ll help you set up your inbox, invite your team, manage tickets, track SLAs, and chat internally. Just the basics to get you going.
Before you begin, it helps to know how Helpdesk is structured.
The Frontend
The frontend of Helpdesk has two portals:
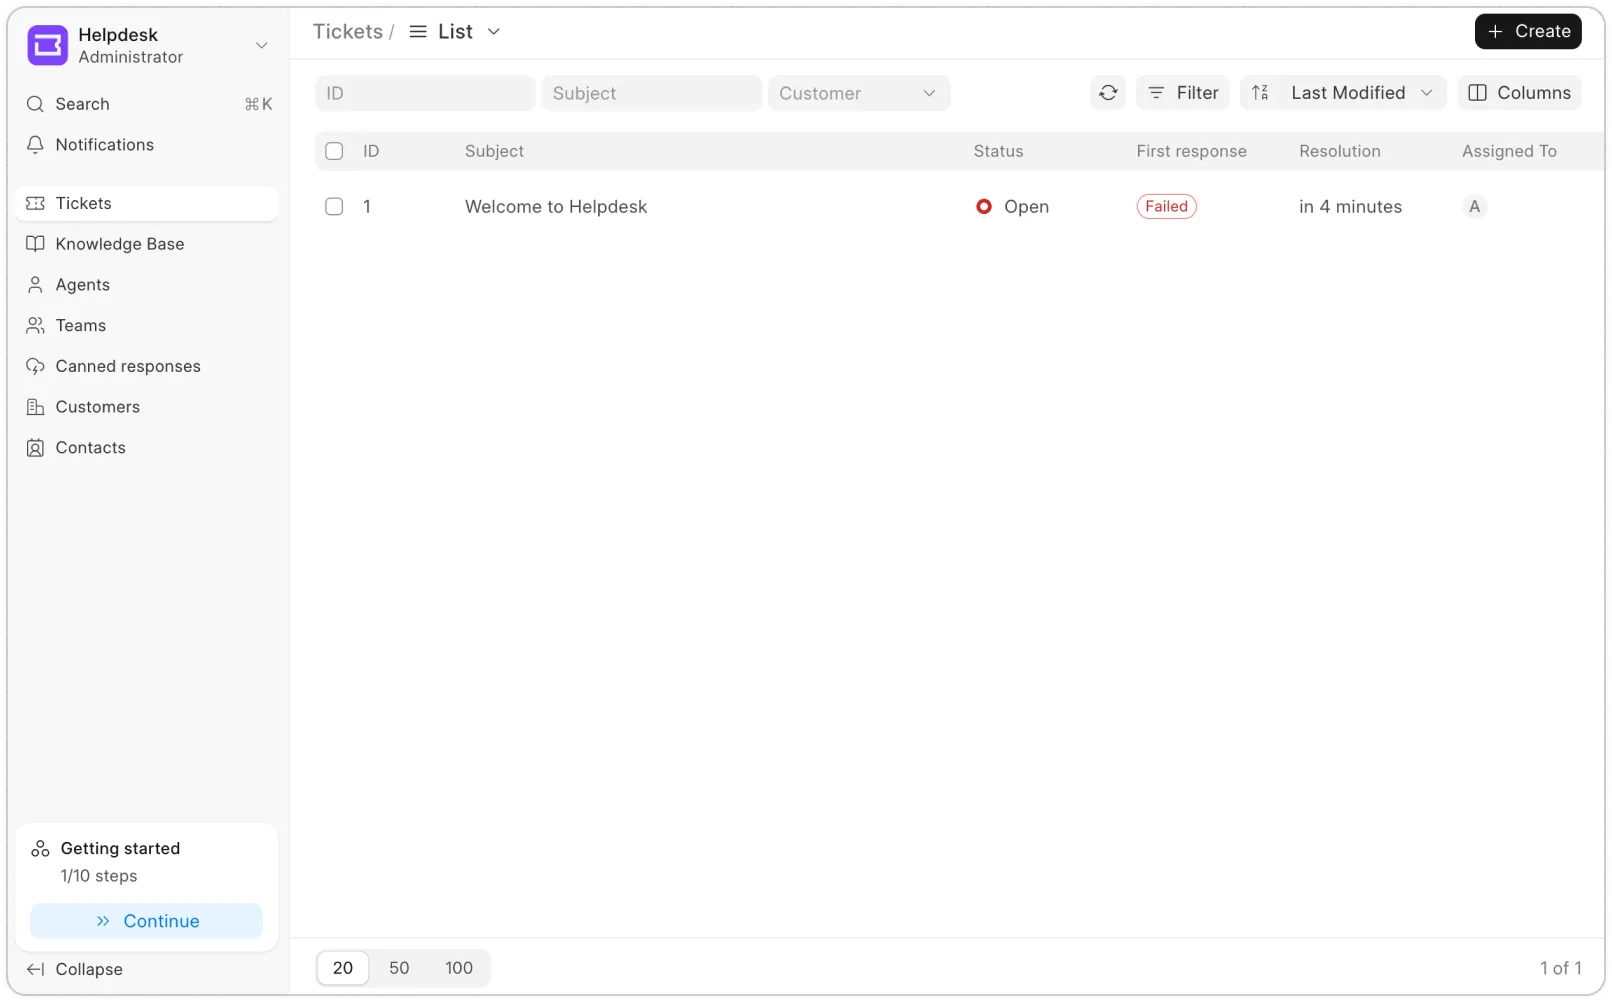
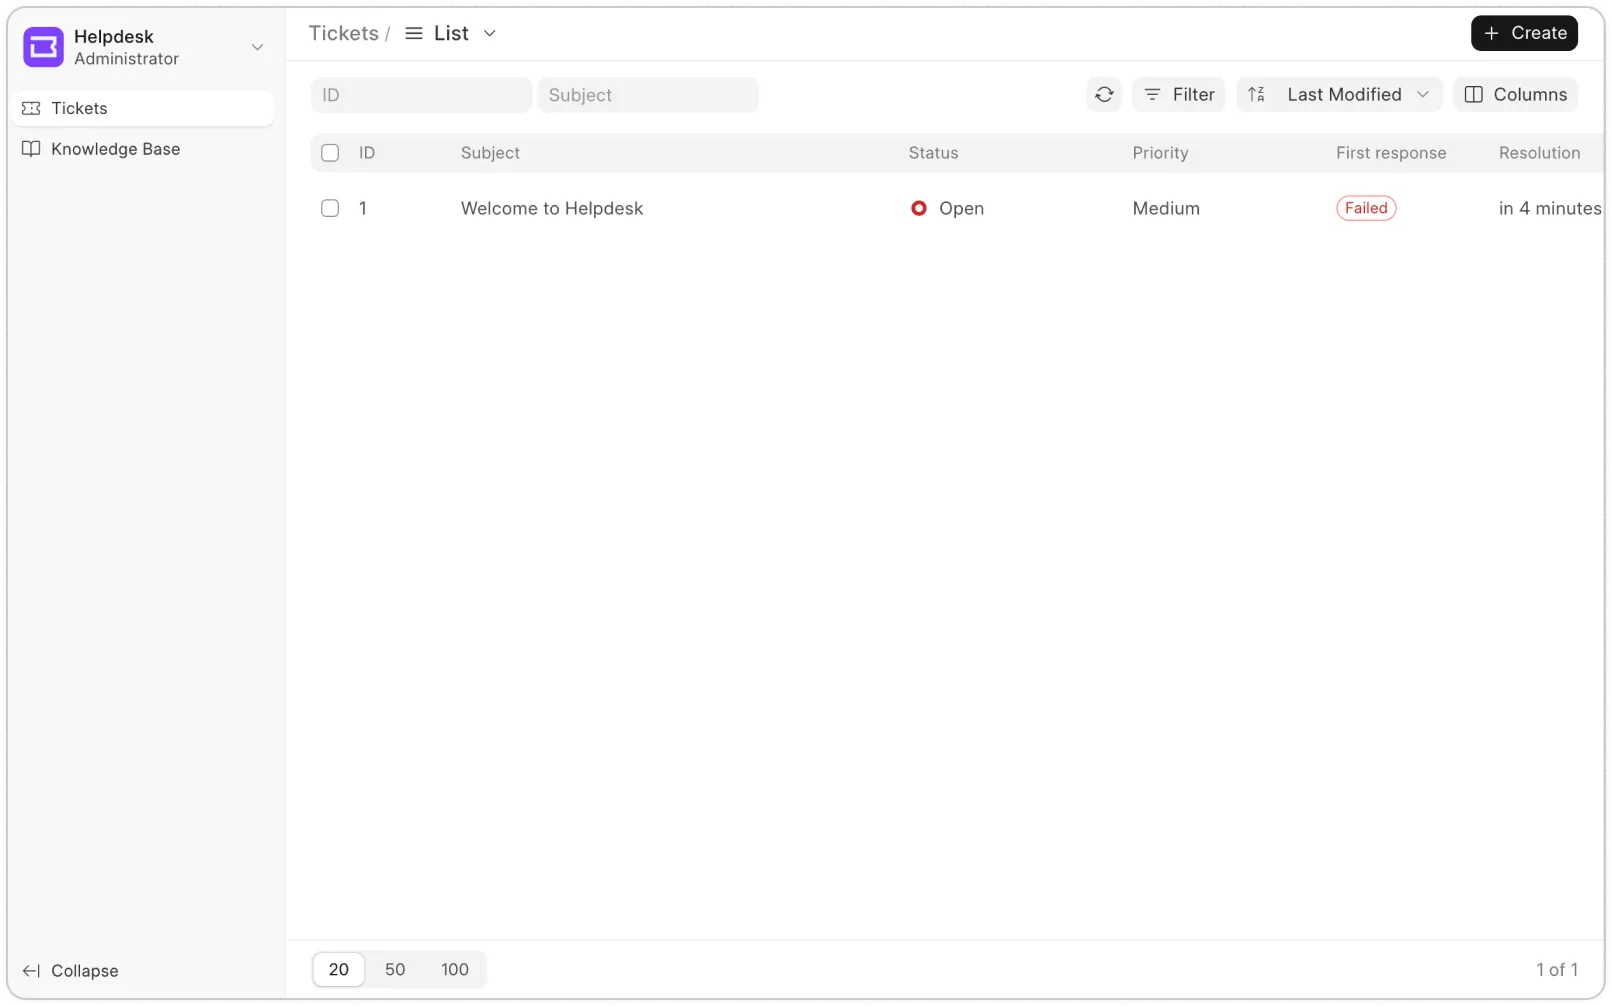
Agent portal: This is the first screen you will see. If not accessible, type add /helpdesk in the URL. This is where your team manages tickets and replies to customers.
The frontend of Helpdesk has two portals:
Customer portal: Where customers can raise tickets and track updates. To access this, go to Settings → Customer Portal.
The Backend (Desk)
To access the desk view, go to Apps -> Desk.
This view only the Admins (System Managers) can access to customize ticket forms and workflows.
This gives you full control over how your support team operates.
Now that you’ve understood the basic structure of Frappe Helpdesk, let’s dive in
and start the setup!
1.
Contents
1.
Basic Setup
a.
Upload your logo
b.
Connect your support email account
c.
Invite agents
d.
Add agents to teams
2.
Set SLA
3.
Set Assignment Rule
4.
Creating Tickets
5.
Advanced Features
6.
Resources
1. Basic Setup
All your basic setup can be done through the Settings in the Agent view.
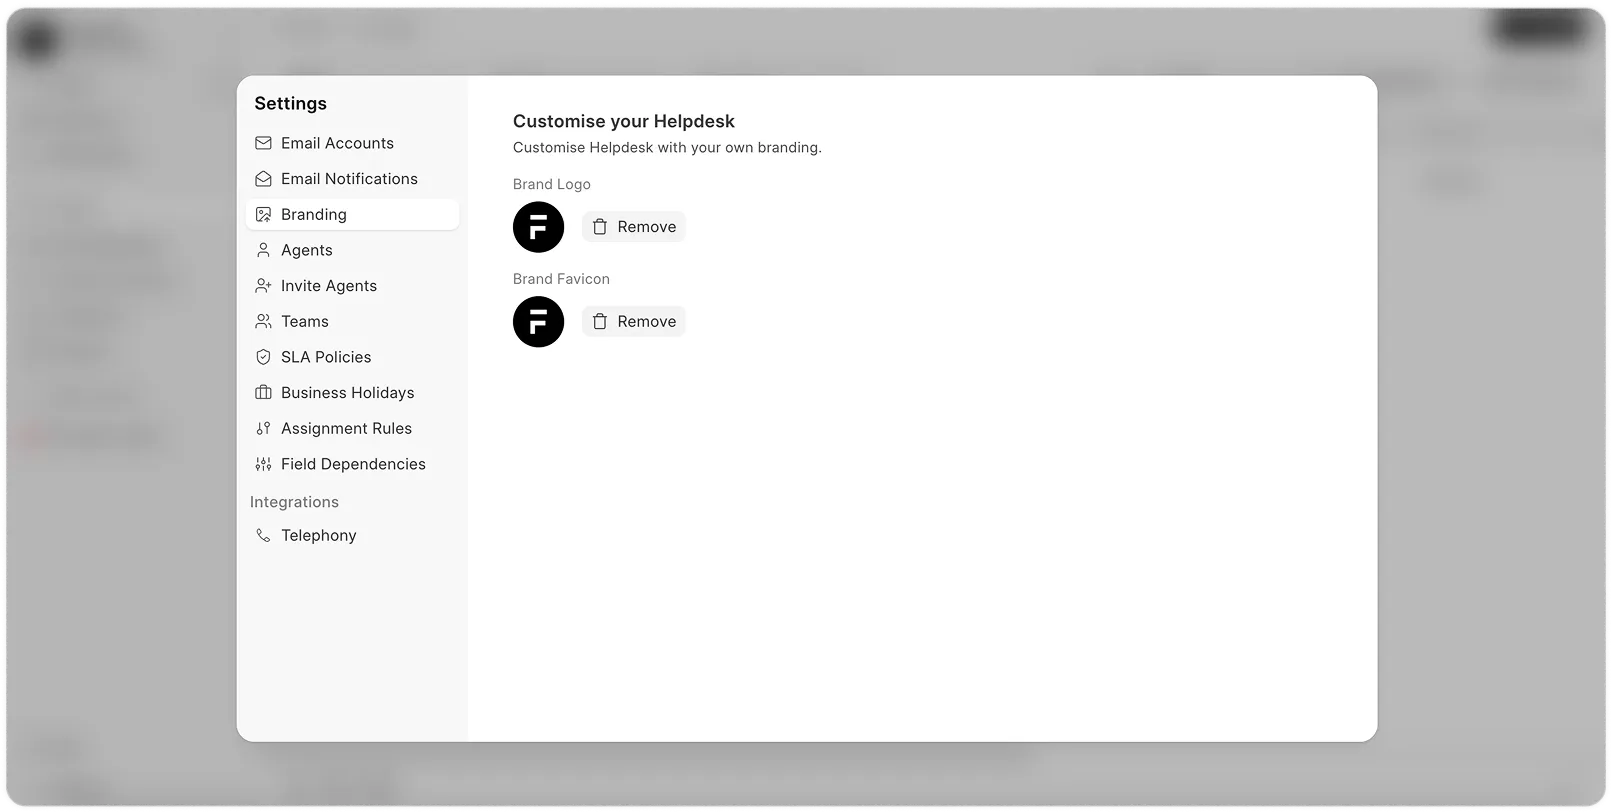
Head to Settings → Branding

a. Upload your logo
To make the support portal your own. Go to Settings → Branding, and update the logo and favicon. This will show up both in your Agent and Customer portal.
Head to Settings → Branding
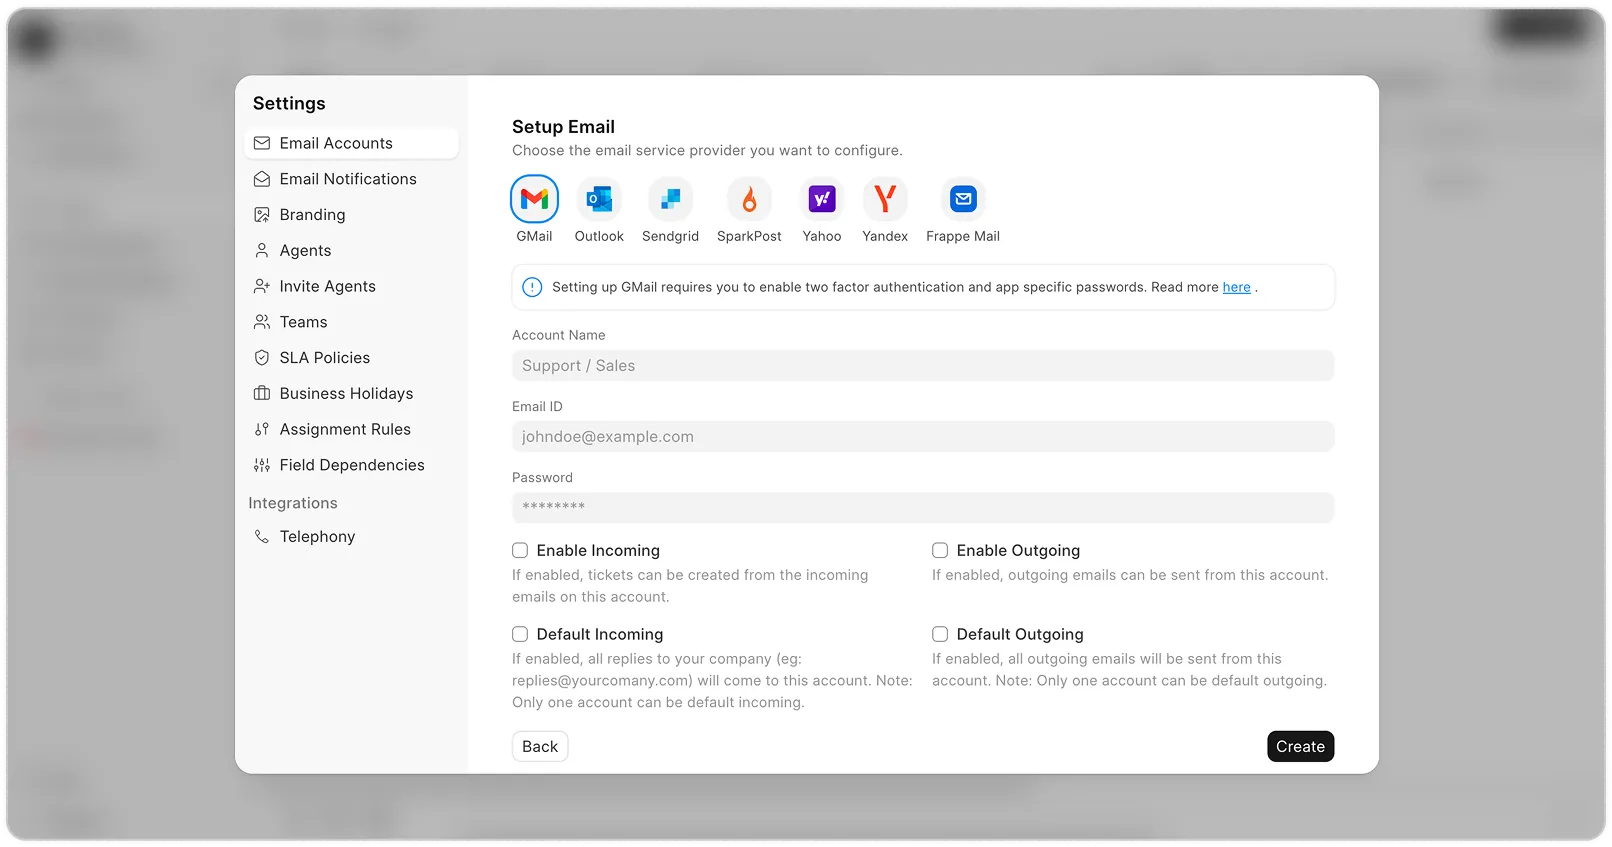
b. Connect your support email account
To set up your email account to send/receive suppot tickets via emails, go to Settings → Email Accounts.
Select the email service provider, and for the rest, follow the steps as
mentioned here.
Head to Settings → Branding
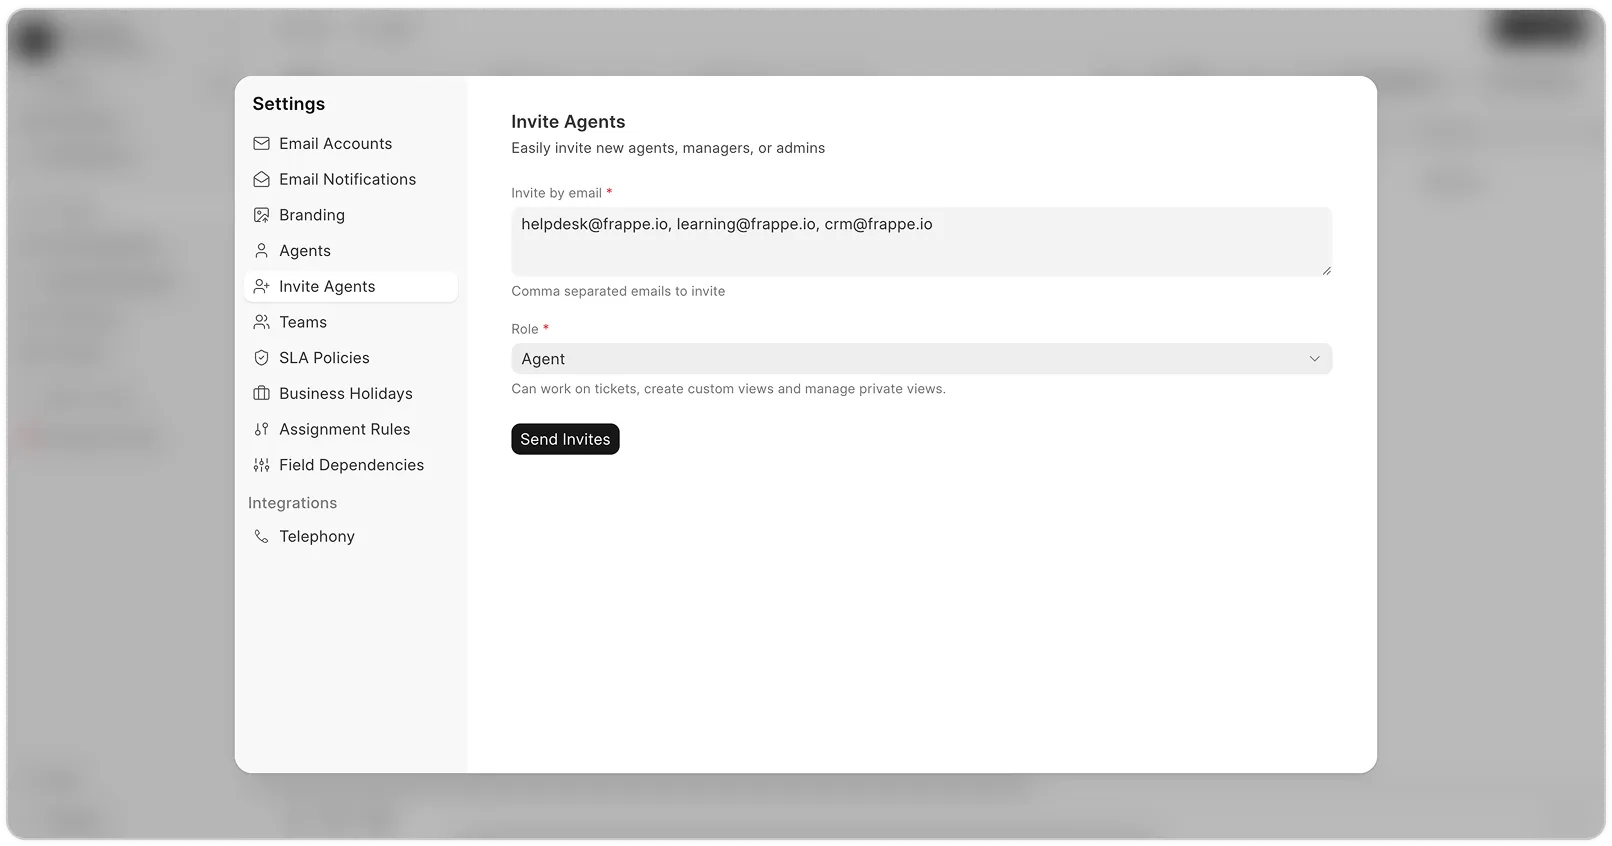
c. Invite agents
Now that you have your email account set up, add your team so they can start replying to tickets. Go to Invite Agents, and add the emails of the agent you want to invite, select the role and click on the "Send Invites" button.
Select the email service provider, and for the rest, follow the steps as
mentioned here.
Head to Settings → Branding
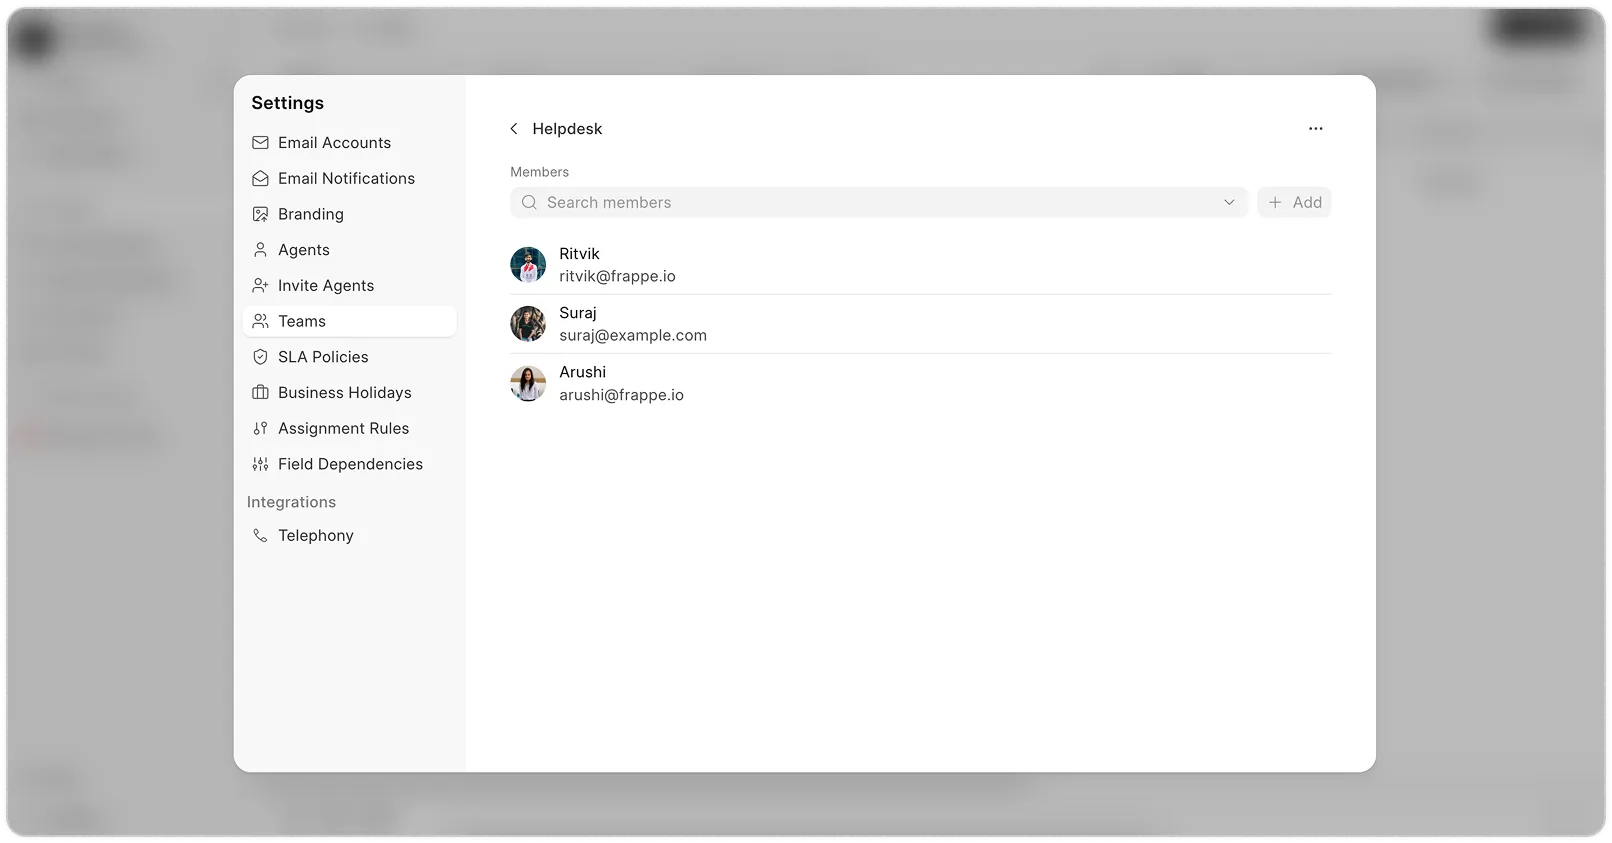
d. Add agents to teams
Next, go to Teams, and create a team. Once the team is created, click on the team to add agents inside each team. When you create a team and add agents to the team, an assignment rule for this team gets automatically created. You can check it and make changes of your own.
Tickets can be assigned directly to agents or routed to a team, where Helpdesk will auto-assign them to a member.
Once this is done, you’re ready to define how tickets get handled.
Select the email service provider, and for the rest, follow the steps as
mentioned here.
Head to Settings → Branding
2. Set SLA
Before tickets start coming in, we need to define how the SLA should be handled. To configure SLAs, go to Settings -> SLA Policies.
Here’s what you can configure:
Set First Response and Resolution times by priority (High, Medium, Low)
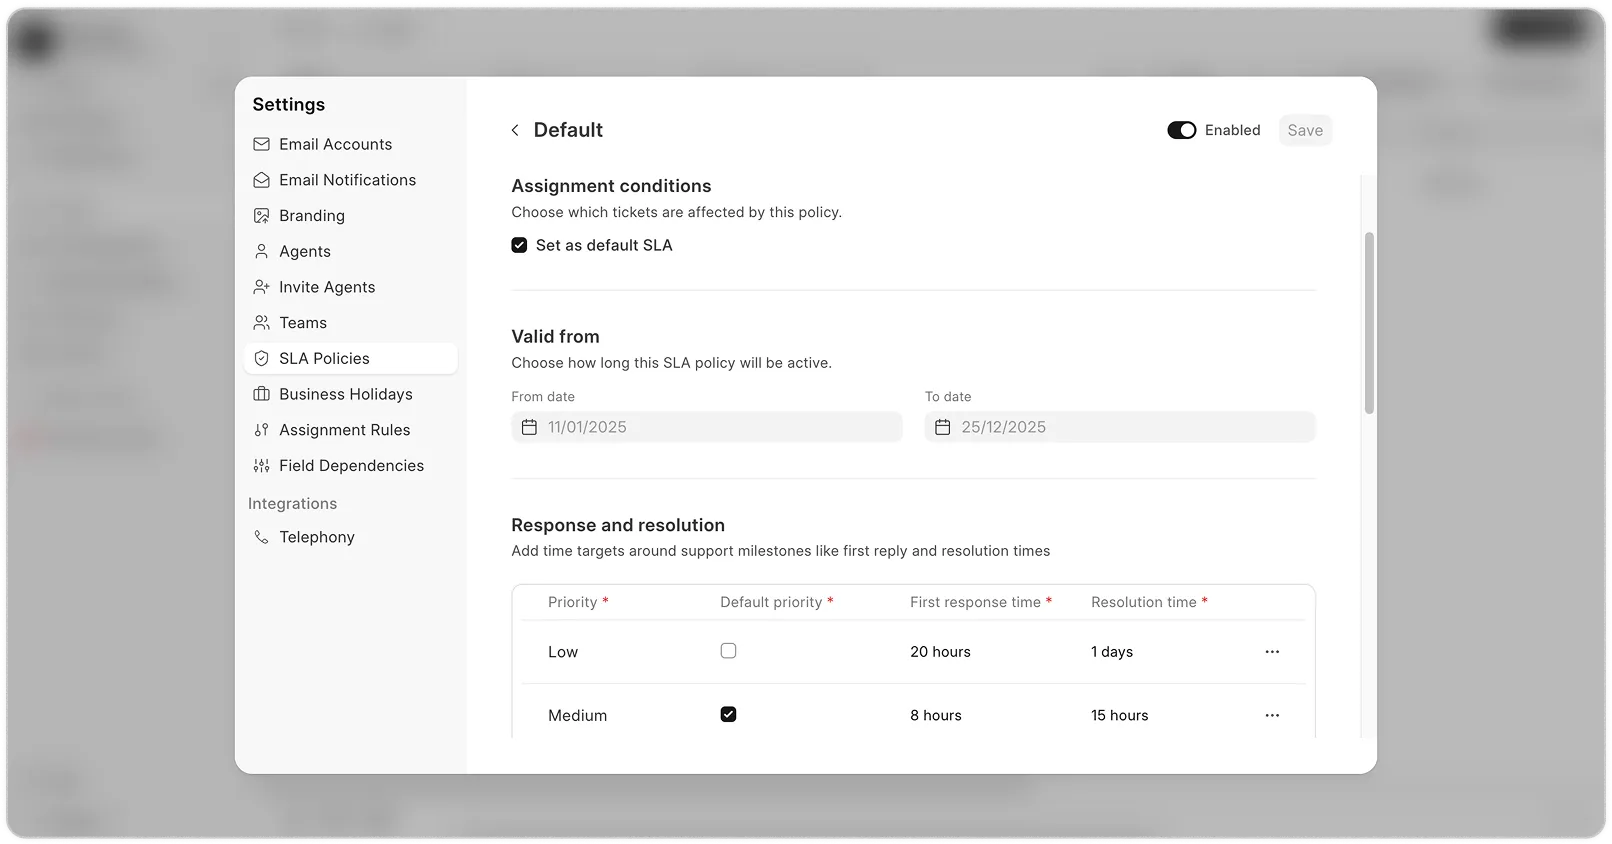
Choose which statuses pause or complete the SLA
Define working hours so timers only count during business time
Link a holiday list to exclude public holidays from SLA calculations
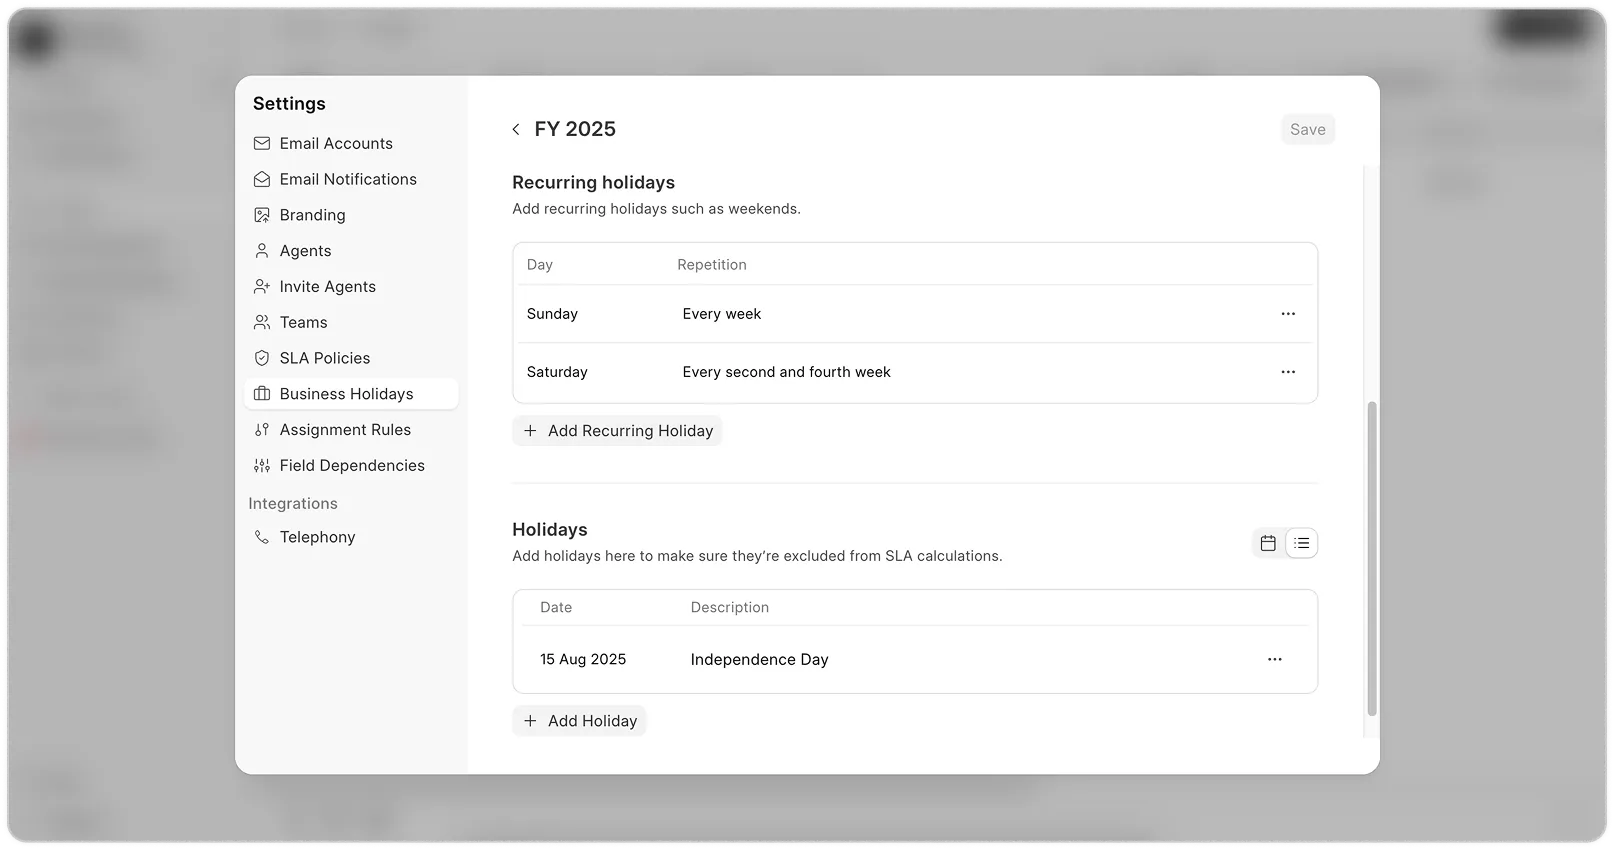
Add conditions to apply SLAs based on ticket fields (like priority or region)
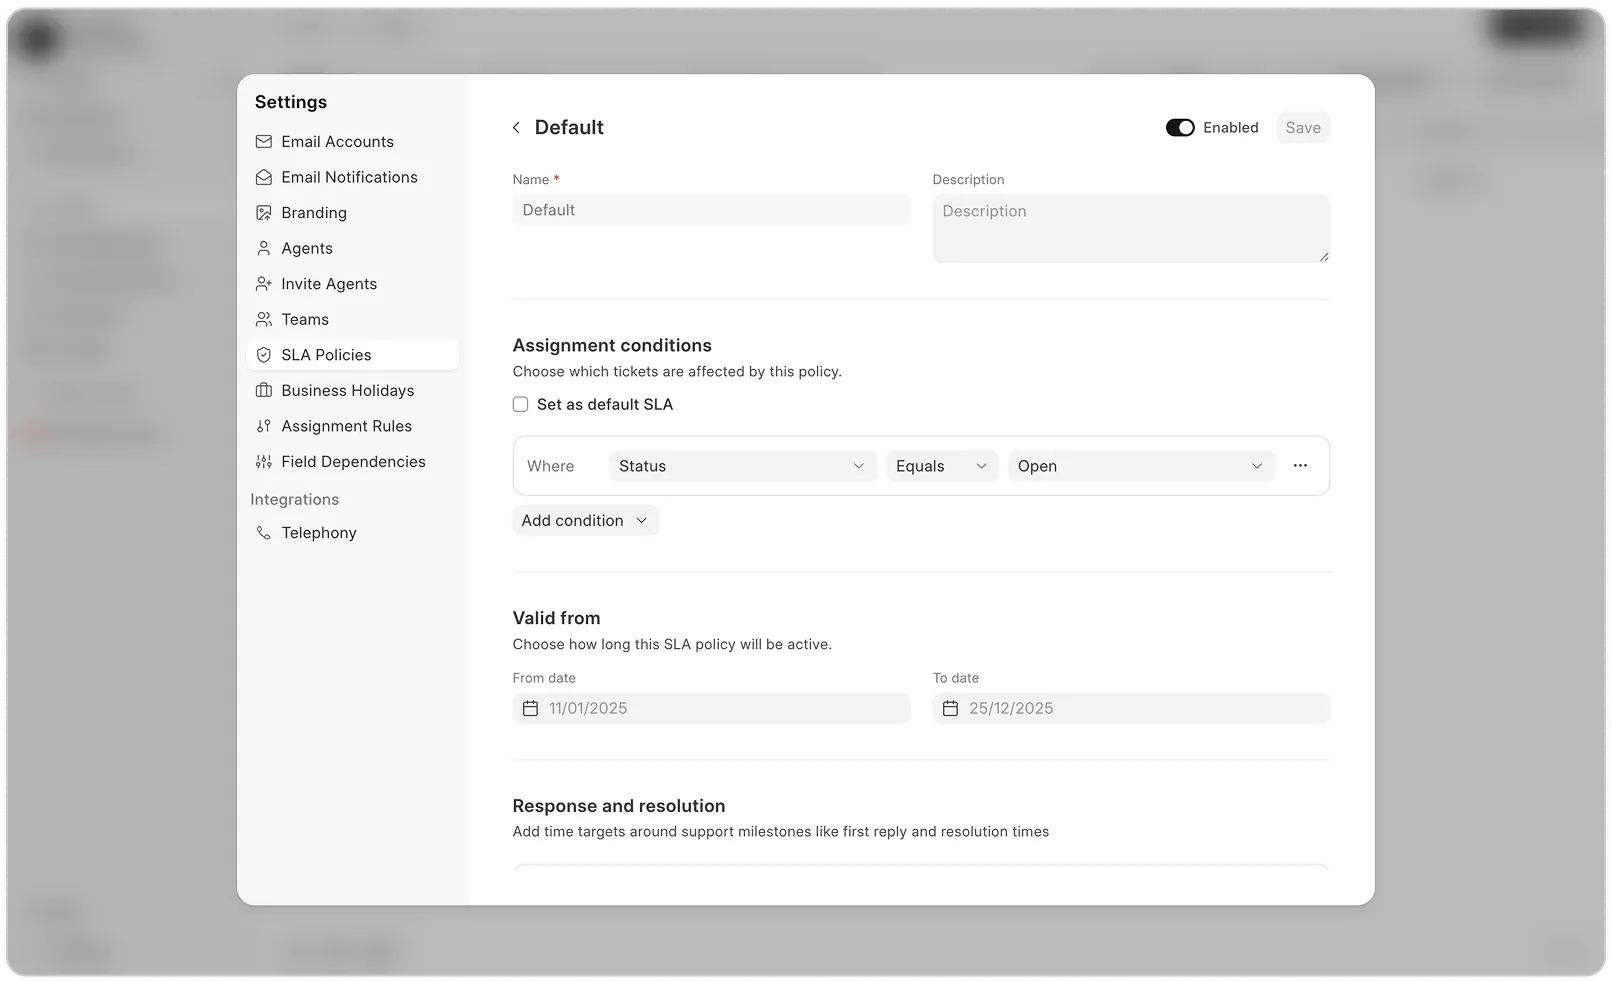
To see detailed steps and examples, read the full SLA documentation.
3. Set Assignment Rule
Courses are made up of Chapters → Lessons.
To create one:
Once your SLA is set, you can use Assignment Rules to automatically route tickets to the right agents based on conditions.
Go to Settings → Assignment Rules.
Click on New.
Define an assign, unassign, and close condition to trigger the rule.
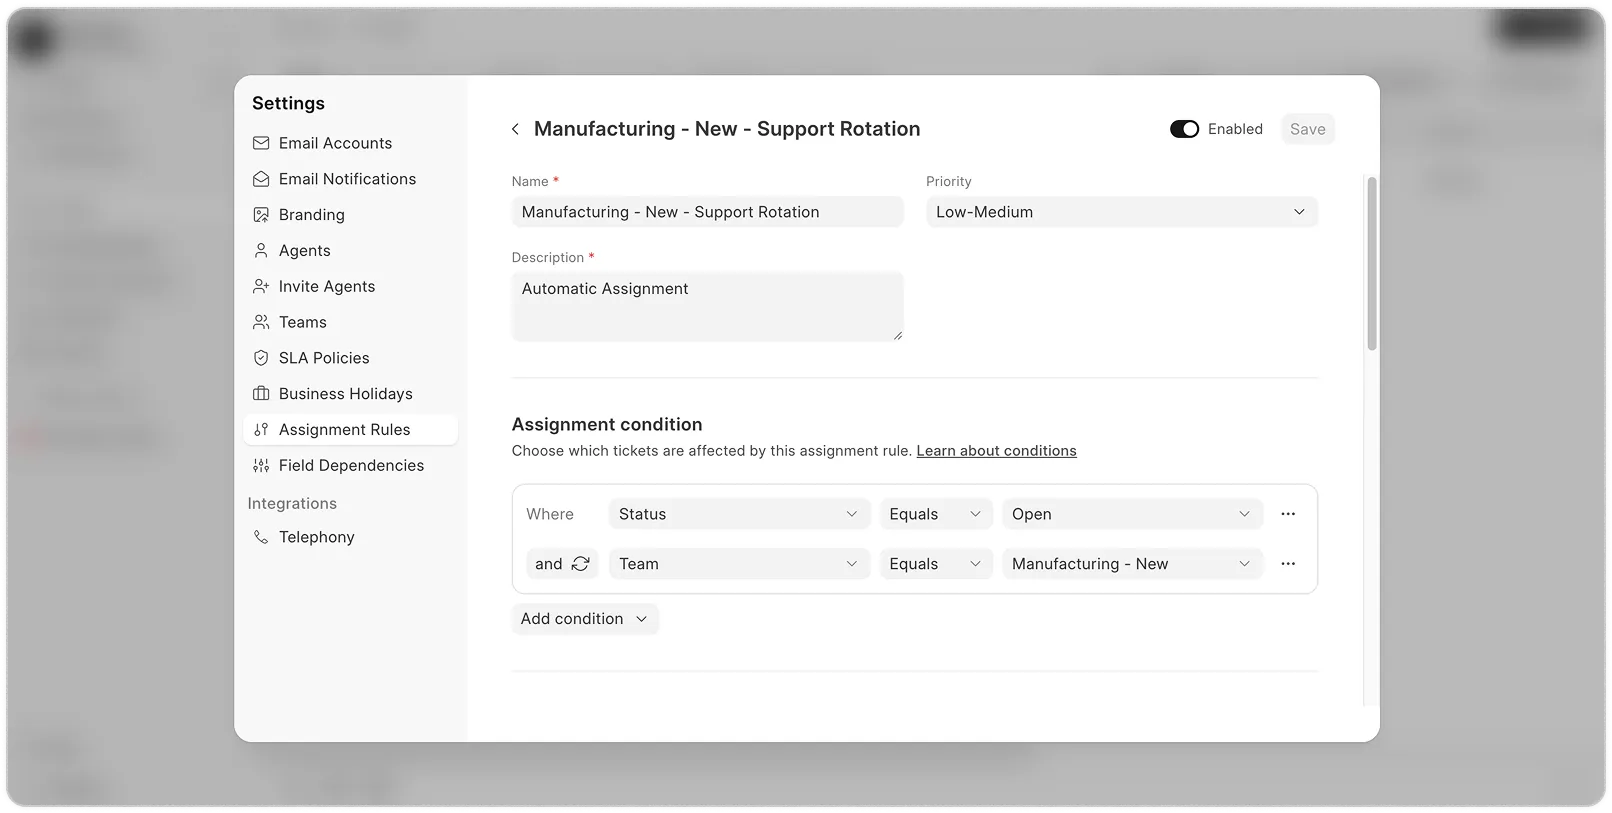
Select the Assignment Days on which you want the Assignment Rule to be active.
Choose how to assign — Auto rotate / Based on workload.
Add users or teams to whom tickets should be assigned.
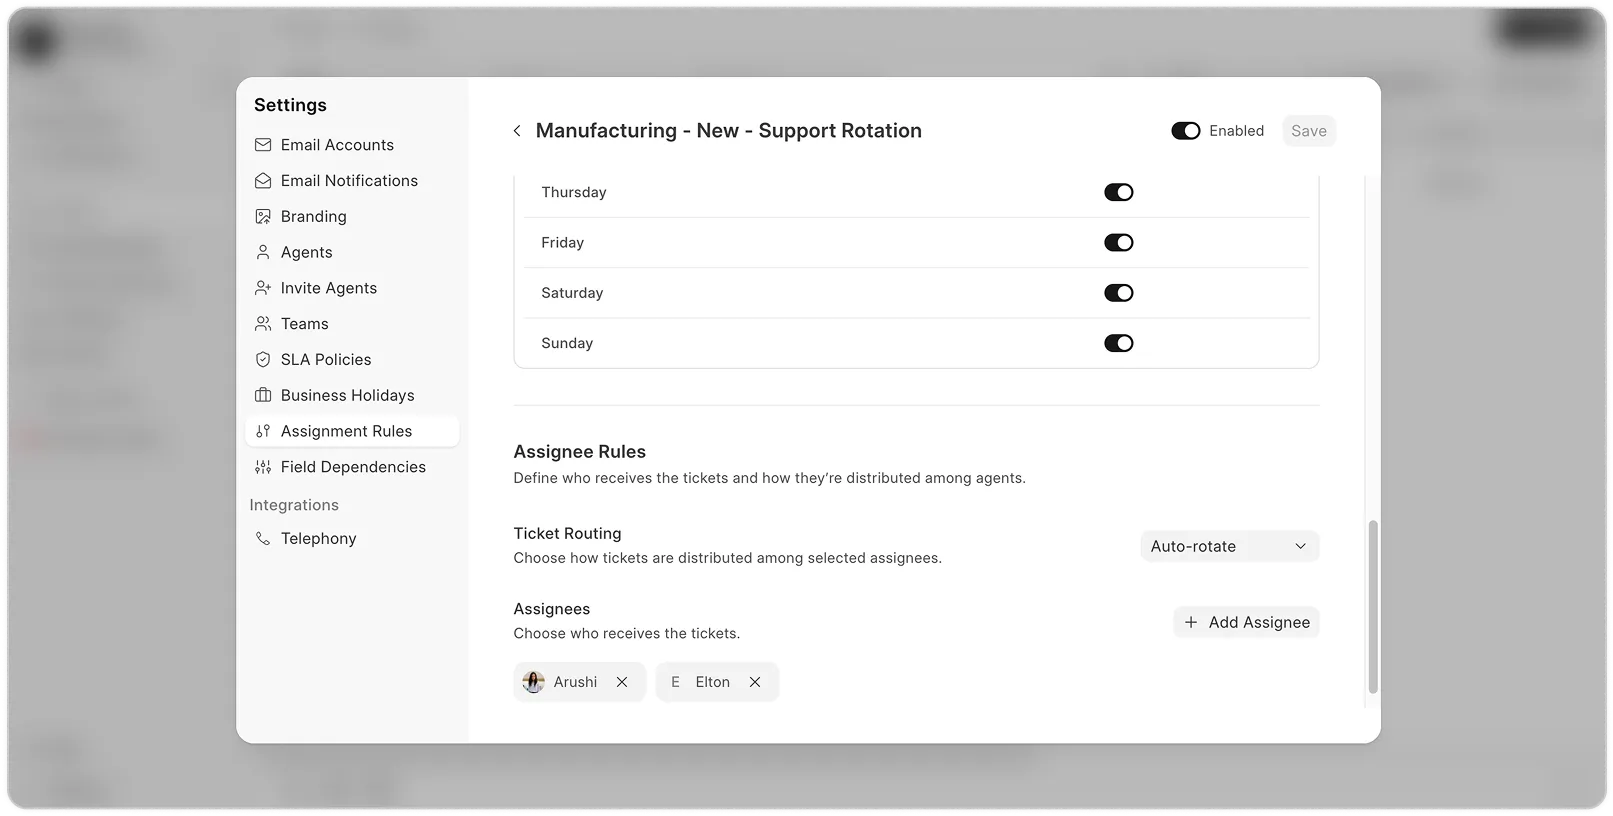
For examples and advanced conditions using Python expressions, read the full
4. Creating Tickets
Courses are made up of Chapters → Lessons.
To create one:
Now that you have everything configured, let's start creating tickets!
There are three main ways tickets can be created:
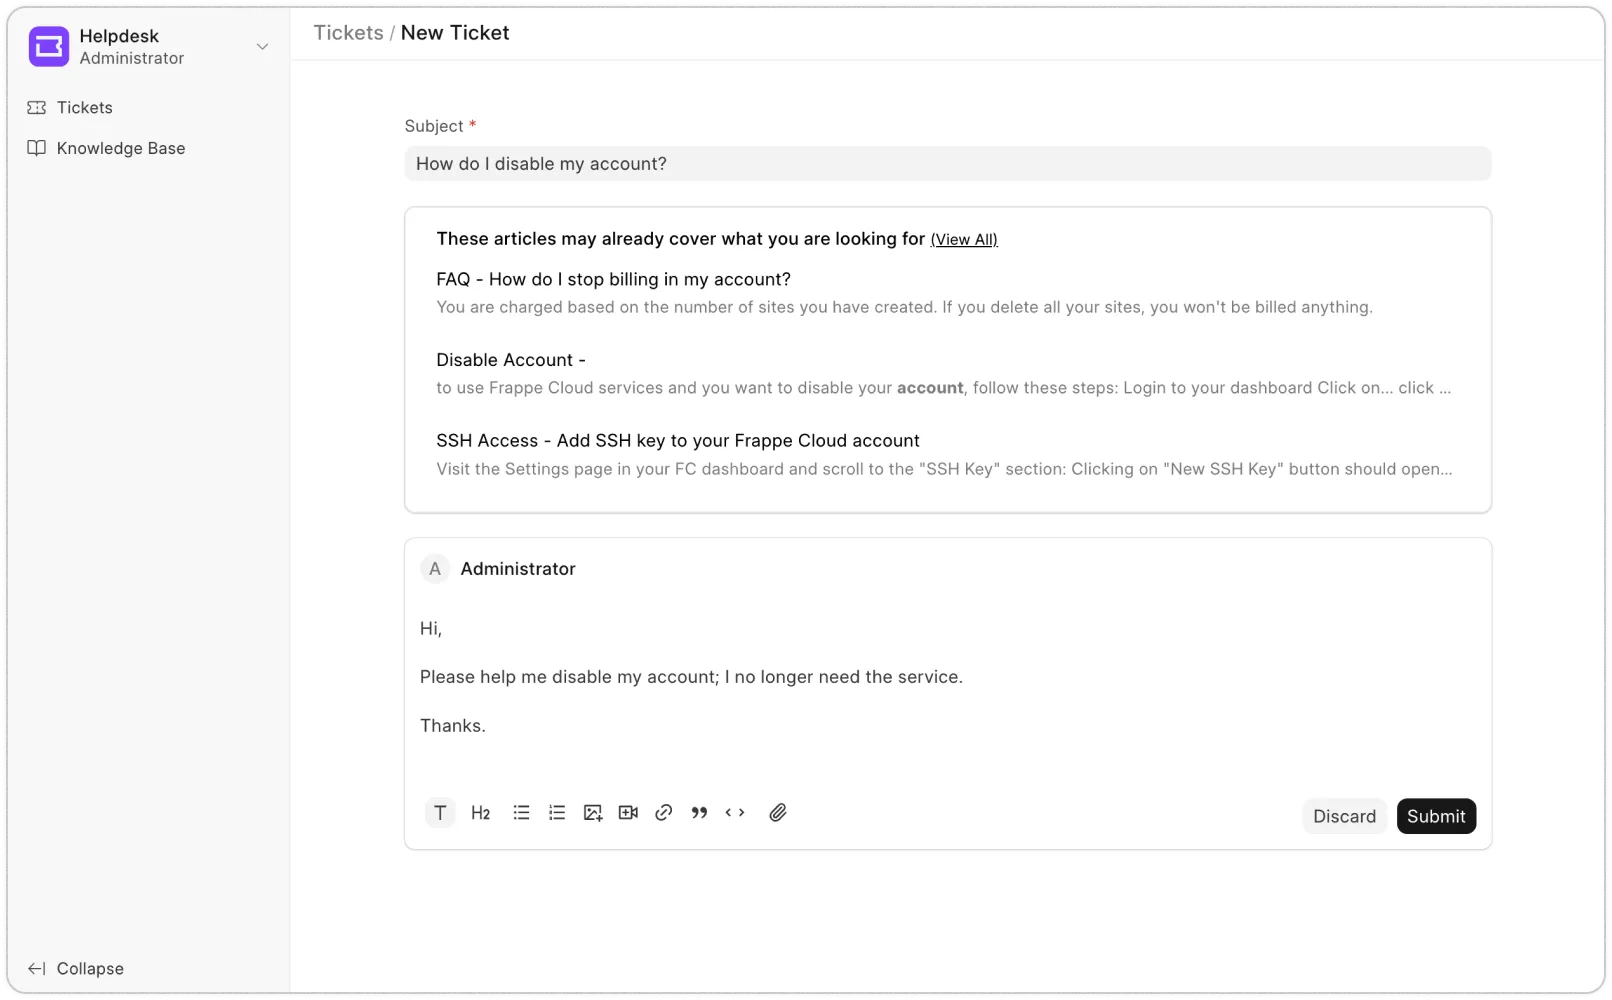
a. Customer Portal
Share your Customer Portal URL with your customers so they can directly log in, raise new tickets, and track updates.
If you have help articles created, your customer should be able to see recommended articles based on subject they’ve typed. Once they’ve created the ticket, agents should be able to see the ticket in the Agent view as well where they work on resolving it. Customers can track SLA and see replies inside the ticket (as and when the Agent responds).
b. Email
If you want your customers to raise tickets via email (e.g., [email protected]), set one of your email accounts as "Incoming" or "Default Incoming." All emails sent to this address will automatically become tickets every 10 minutes.
If you have help articles created, your customer should be able to see recommended articles based on subject they’ve typed. Once they’ve created the ticket, agents should be able to see the ticket in the Agent view as well where they work on resolving it. Customers can track SLA and see replies inside the ticket (as and when the Agent responds).
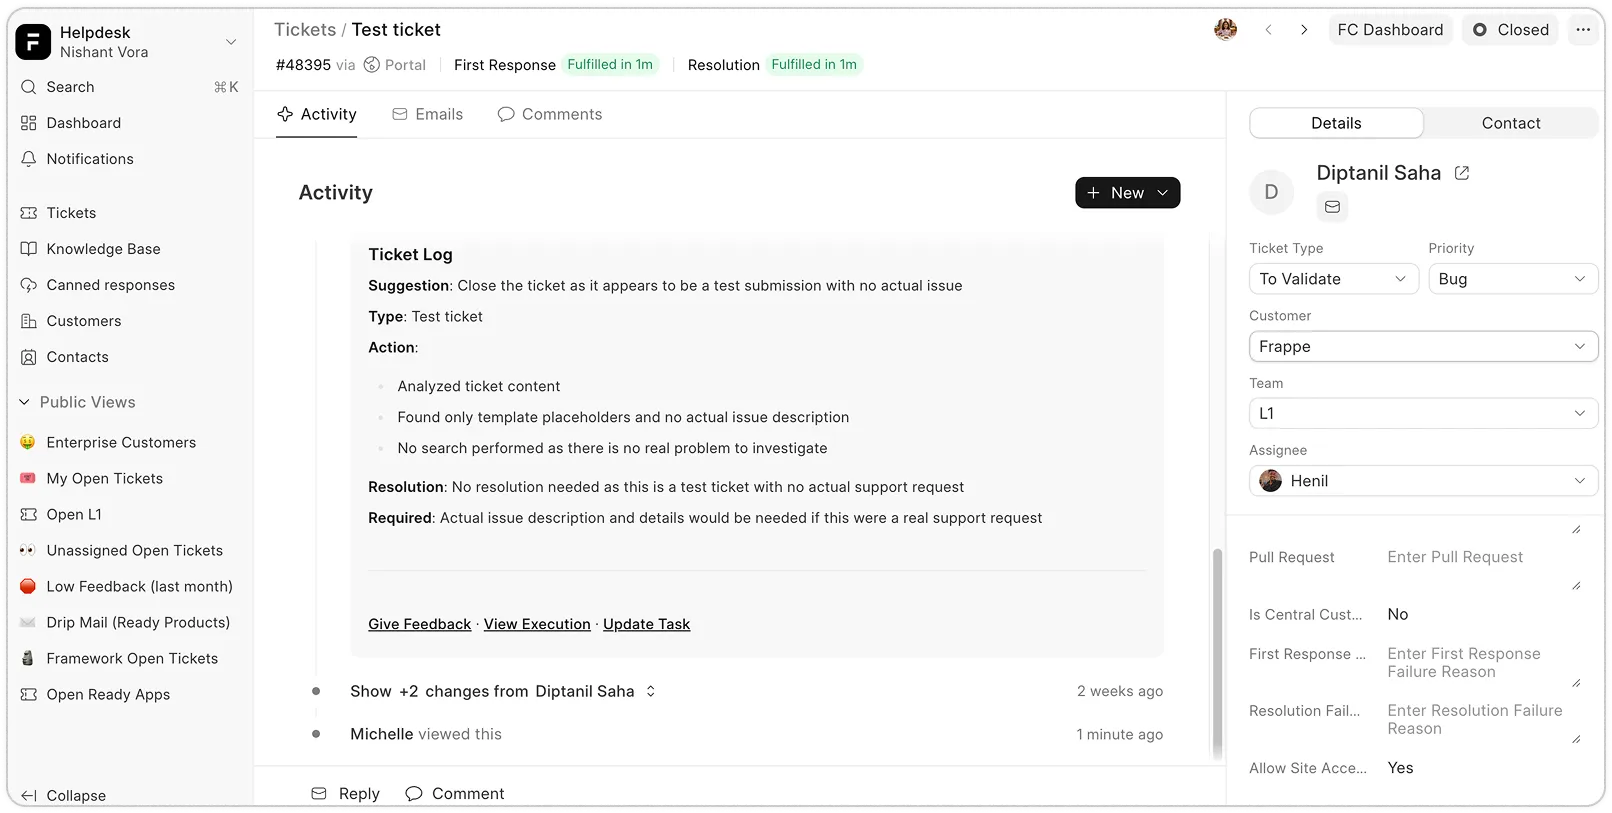
c. Agent Portal
If your agent receives a customer query through a call or chat, they can manually create tickets in the agent portal. After submitting, you'll immediately see the
new ticket.
In the ticket view, you can see ticket details, SLA timers, customer replies, agent assignments, priority settings, team changes, internal comments, and tagging—all in one place.
If you have help articles created, your customer should be able to see recommended articles based on subject they’ve typed. Once they’ve created the ticket, agents should be able to see the ticket in the Agent view as well where they work on resolving it. Customers can track SLA and see replies inside the ticket (as and when the Agent responds).
5. What Next?
Courses are made up of Chapters → Lessons.
To create one:
Now that you have everything set up, you're good to go. But if you're curious, there's more!
Customize ticket forms and add custom fields to suit your team's workflow.
Save time with canned responses.
Set up a knowledge base for self-serve support.
Configure notifications to stay informed.
Need help along the way?
Here are a few links you might find useful:
Documentation – Learn how everything works
Website – Explore features, pricing, and more
Support – Reach out if you get stuck
Call logs with Twilio or Exotel, including recordings.
WhatsApp integration to connect with customers on their preferred platform.
Discover other Frappe products – Check out our open-source tools to make your business more efficient
SLA rules to ensure timely responses.
Assignment rules to auto-assign leads and deals.
Workflow actions to automate repetitive steps.
ERPNext integration to create quotes and continue with your sales and
accounts cycle.
Custom views and filters to build reports your way.
If you’re curious, you can explore these anytime in our docs. But for now, you’re good to go.
Keep it simple. Stay close to your leads. And enjoy using a CRM that actually feels good to use.
Read next: Upgrade
CONTINUE EXPLORING
Frappe Helpdesk